3/11/09

Re-Zipped

I found this on Etsy this morning and thought it to be a good share:

Description:

Reuse, Reduce, Recycle and Repurpose!!

Vintage zippers creatively transformed into beautiful brooches. The metal teeth highlight the colorful tapes creating a stunning affect.Light mauve petals surround swirled gold centers to create this multi-flower brooch which measures approximately 2 x 3.5 inches, 5 x 9 cm.

It is backed with felt and has a nickel pin back. It has been signed and numbered and will arrive nestled in a white jeweler's box.

Click here to be taken to seller's Etsy page where you can purchase your own one-of-a-kind re-use art for only $28.00.

3/10/09

Recycled Fashion - Good Idea of Just Plain Fugly?

Okay, personally, carrying a juice-bag purse around is not my thing, but I like the general idea:

http://blog.epa.gov/blog/2009/03/10/climate-for-action-can-we-recycle-for-fashion/

What think you?

3/9/09

Waste Not Your Stinky, Brown Bananas

Don't throw those stinky, brown, rotting bananas away! Use them!

Problem: Stinky, brown bananas... such an eyesore and such a waste!


Solution: Waste not, friends! Make banana bread.


Many people don't realize that stinky, brown bananas are truly the key to making delicious, mouth-watering banana bread. Fresh bananas simply won't do. They just won't.


Here's a recipe for banana bread that I found, calling for 3 or 4 ripe (aka: stinky, brown) smashed bananas!


Banana Bread Recipe

Ingredients
3 or 4 ripe bananas, smashed
1/3 cup melted butter
1 cup sugar (can easily reduce to 3/4 cup)
1 egg, beaten
1 teaspoon vanilla
1 teaspoon baking soda
Pinch of salt
1 1/2 cups of all-purpose flour

Method
No need for a mixer for this recipe. Preheat the oven to 350°F (175°C). With a wooden spoon, mix butter into the mashed bananas in a large mixing bowl. Mix in the sugar, egg, and vanilla. Sprinkle the baking soda and salt over the mixture and mix in. Add the flour last, mix. Pour mixture into a buttered 4x8 inch loaf pan. Bake for 1 hour. Cool on a rack. Remove from pan and slice to serve.


***Tip: Don't want to leave them sitting around your kitchen, or just not ready when your bananas are finally stinky, brown? Simply freeze them! I have a whole shelf of frozen bananas in my freezer, just waiting to be turned into banana treats!

3/8/09

Skid-Proof Home Decor

We realized several weeks ago that our shower floor is pretty damn slippery. After nearly everyone in the family had taken a near spill, it became apparent that we needed a solution.

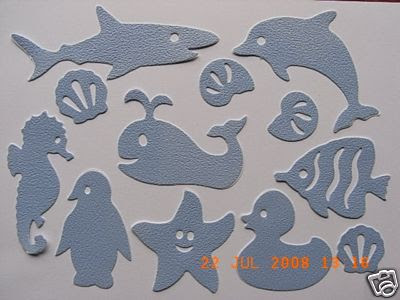
So, we went out and bought some of those non-slip shower stick-on's. We chose the gray butterflies because they were, believe it or not, the least feminine or childish of the choices in shapes. The choices were essentially these:

So, we got home to find that our husband is HORRIFIED by this idea. I guess the image of himself prancing around in the nude atop cute, whimsical butterflies was offensive to his manliness. We quickly got a staunch "no go" on that idea.

Now, however, we were stuck with this whole pack of shower stickers that we secretly thought were kinda cute. And we certainly couldn't return them because they were already opened.

Problem: What to do with those shower stickers we're not allowed to affix to the shower floor?

Solution: Wall art! We discovered that these stickers make really cute, modern wall art that just happened to look really nice on our closet doors.

And the best part is that they're not flimsy so they can be removed multiple times without tearing and they didn't remove any paint or cause any damage to the doors... trust me, I had to move them around for a long time before I got them in a pattern I liked.

Check it:

I can imagine using the more feminine or childish shapes in a child's room, a kid's bathroom or as stencils even.

...Somehow the closet door idea got by Hubby's filter.. maybe it's the lack of walking on them while nude, we're not sure. But, we're so glad we didn't have to throw them away.

PS -- We ended up with what I'll refer to as a "grandma mat" in the bathtub to prevent slipping. Apparently Hubby is comfortable with that idea.

3/3/09

The Curious Case of Bags of Buttons

Speaking of those lil' bitty button bags we talked about yesterday... while we conquered the problem of the little plastic bag itself, we didn't address the buttons inside. But never fear my friends, Everyday Alternative has a solution for that too!

Problem #2 The Buttons

What to do, what to do with all those extra buttons? First, make sure you're not going to need them anymore. We kept 4 or 5 distinguishable buttons ..just in case.

Solution ...All-in-One Jewelry Storage System

We are total jewelry hags. We love the stuff. We're lucky that our husband is not only great at picking out jewelry on special occasions, but also very supportive of our habit. (phew!)

At the current time, however, we live in a very small space and so all our necklaces are crammed into this foot-tall, box shape, clear necklace storage thing. While it serves the purpose of storing the jewelry, it makes finding anything a nightmare of tangled necklaces. Plus, we often find ourselves just grabbing the easiest thing to grab and not really wearing what we want... or being able to see it for that matter.

So, we took all those extra buttons and super-glued them to an extra hanger we already had lying around. We made sure to glue the biggest buttons so that they left a "ledge" for hanging, along the long, straight (bottom) part of the hanger. Smaller buttons turned out to be perfect for hanging bracelets and poking earrings through. And it sure makes picking out jewelry in the mornings a whole lot easier...plus we can really see what we have.

Here's what it looked like while we were working on it:


And voila! Here's the end result:


Total time: Maybe 30 minutes, but let the glue dry over night before placing jewelry on it.

Alternative Options: More buttons, possibly using a hot glue gun, different sized buttons, more hangers

Let us know what you think if you try this out.

3/2/09

Lil' Bitty Button Bags


Don't know about you, but we always feel inclined to keep the buttons that come with clothes we buy. And, quite honestly, after taking inventory this evening, we have a plethora of buttons that we're pretty sure have no clothes to go with them anymore... seriously, we've been saving these things for years.

Problem #1: Button Bags

What are we supposed to do with all those lil' bitty button bags? They're plastic which we know is bad for the environment, but we clearly can't take our lunch to work in something this size.

Solution: Individual Pill Bags

We thought of this when our husband called and asked us to run some Advil out to him this evening. It didn't seem right to carry a handful of Advil out to the car and expect him to swallow them after ruminating in our sweaty palms. DING, the light went off! The button bags! This little guy made the perfect individual carrying case.

AND, we think it would be the perfect way to pack pills for a trip... at least so you didn't have to get one of those grandma pill-carrying cases that you buy at the drug store. You could simply put all your daily meds/vitamins/pills in a marked bag and have a quick grab at it, on the go!

And the best part is that they'll hold up time and again, we bet!

iPod Bit the Big One? No Tears, Just Lung Cancer!

Broken iPod? No need to get angry and throw it out the car window. Strip it of all its dignity and then make it into a cigarette case!