4/9/09

Displaying Your Earrings - Easier Done than Said!

This is, hands-down, our favorite re-use for an everyday object ever, crafted with love and care by our wonderful hubby.

We clearly have a thing for jewelry and finding ways to organize, sort through and even display some of our favorite pieces is always a problem. If you throw, say, a bunch of earrings in a bowl, you then have to dig through that bowl to find the second half, (or sometimes even the first) which is not always easy or convenient --so, you really need some sort of display:


Voila!
How did he do it, you ask? It was actually rather simple. He took the glass and backing off of a picture frame we didn't want to use anymore. He then used a picture hanging kit that he had rotting away in his tool kit and affixed the wire from said kit into sides of the frame, frame. Next thing we knew, we had a super cute earring display -- no clutter or mess or problems finding anything, ever again!
...and our favorite part is that this is so cool looking, we leave it out for all to see. We could even hang it on the wall if we wanted!

4/8/09

Planters Need Cozies Too!

How cool is this Re-Nest blog idea? Who knew that planters needed cozies too? And you can make them out of cute, old socks! Perfect!

10 New Uses for Lemon


According to a Real Simple magazine article, there are 10 uses for a lemon, other than being a lemon, of course:


1. Sanitize a chopping block. Run a slice of lemon over the surface to disinfect.


2. Eliminate the browning that occurs when food sits out too long. Sprinkle apple or pear slices with lemon juice before serving, or squeeze a bit into guacamole and give it a stir.


3. Remove tough food stains from plastic and light-colored wooden cutting boards. Slice a lemon in half, squeeze the juice onto the soiled surface, rub, and let sit for 20 minutes. Rinse with water.


4. Fade tea stains on cloth. Dilute lemon juice with an equal amount of water. Use an eyedropper or a Q-tip to make sure the juice targets the stain. Thoroughly flush with cool water.


5. Decorate on the cheap. Fill a glass bowl with lemons for a sunny centerpiece. Or display a row of them along a windowsill.


6. Relieve a sore throat. Cut a lemon in half. Skewer one half over a medium flame on a gas stove or an electric burner set on high and roast until the peel turns golden brown. Let cool slightly, then mix the juice with 1 teaspoon of honey. Swallow the mixture.


7. Whiten fingernails. Rub a wedge on the surface of your nails.


8. Shine the interior of copper cookware. Sprinkle a lemon wedge with salt, then scrub.


9. Brighten laundry whites. Add 1/2 cup lemon juice to the wash cycle of a normal-size load.


10. Remove soft cheese or other sticky foods from a grater. Rub both sides of the grater with the pulp side of a cut lemon.

Pot and Repot

Our husband collects bottle openers. And while we whole-heartedly support this habit, we don't love all the bottle openers we have acquired in various locations throughout the kitchen of late.

Our solution? We had this pot laying around that had been used to house an orchid. We, of course, lacking a green thumb, managed to kill said orchid within months of it being gifted to us. The pot that remained was cute, but had funny slits in it to accomodate the unique needs of the orchid. We opted not to replant a new orchid given our difficulty with the first one (Did we mentioned we accidentally killed it?) But how in the world could we reuse such a weird pot?

bottle openers + funny, slitted pot = a storage solution for Hubby's collection! YAY!

Speaking of sheet sets...

Speaking of sheet sets... need a handy way to protect those sets if you don't have a super clean place to store them? (We, for instance, have no linen closet and store our sheet sets with the dustbunnies, under the bed) No one likes to pull out a clean set of sheets to find them riddled in dust or dirt!

How about that gift box you've been saving from Christmas? Gift boxes (with or w/o lids) make the perfect storage container for sheet sets, keeping them organized and clean!

Sleepy time...

Few tasks annoy us more than opening our linen closet, eagerly anticipating fresh bed dressing, and trying to dig out the various pieces of the sheet sets. Inevitably, there is always one piece wrinkled up like an old prune, caught in the closet cracks or just plain MIA.

We've found the perfect solution: wrap your sheet sets in their respective pilllowcase, right off of the drying line. Stack your tidy, sheet bundles neatly in the linent closet and you never have to worry about tracking them down or ironing them again.

A-jar or two or three....

Admit it. You secretly long to find a use for those gorgeous, glass jars and cringe every time you throw one in the recycling. We do!

You know what we're talking about -- the one that used to contain spaghetti sauce, bubble bath, jelly...Well, friends, we always save those beautiful, glass jars because they make excellent storage containers.

While we'll show you what we used them for, it's important to note that you probably won't have the exact same use/same storage issues. (As you'll see below, we used them to contain cat toys, diswashing supplies and doggie poop bags) The point is to open you mind up to the thousands of ways you can re-use these everyday items in a new way and avoid throwing them out at all.


3/26/09

The Hat Trick

Such a cool idea and totally stolen from our work's sustainability coordinator.
Got an old hard hat lying around? Why not use it as a hanging planter?

How cute is that? Seriously? Our workplace has a ton of leftover lying around -- maybe they're just a bit too beat up to be reliable anymore. Maybe they're not the right color for your job anymore. But don't throw it away, make something of it!

3/11/09

Re-Zipped

I found this on Etsy this morning and thought it to be a good share:

Description:

Reuse, Reduce, Recycle and Repurpose!!

Vintage zippers creatively transformed into beautiful brooches. The metal teeth highlight the colorful tapes creating a stunning affect.Light mauve petals surround swirled gold centers to create this multi-flower brooch which measures approximately 2 x 3.5 inches, 5 x 9 cm.

It is backed with felt and has a nickel pin back. It has been signed and numbered and will arrive nestled in a white jeweler's box.

Click here to be taken to seller's Etsy page where you can purchase your own one-of-a-kind re-use art for only $28.00.

3/10/09

Recycled Fashion - Good Idea of Just Plain Fugly?

Okay, personally, carrying a juice-bag purse around is not my thing, but I like the general idea:

http://blog.epa.gov/blog/2009/03/10/climate-for-action-can-we-recycle-for-fashion/

What think you?

3/9/09

Waste Not Your Stinky, Brown Bananas

Don't throw those stinky, brown, rotting bananas away! Use them!

Problem: Stinky, brown bananas... such an eyesore and such a waste!


Solution: Waste not, friends! Make banana bread.


Many people don't realize that stinky, brown bananas are truly the key to making delicious, mouth-watering banana bread. Fresh bananas simply won't do. They just won't.


Here's a recipe for banana bread that I found, calling for 3 or 4 ripe (aka: stinky, brown) smashed bananas!


Banana Bread Recipe

Ingredients
3 or 4 ripe bananas, smashed
1/3 cup melted butter
1 cup sugar (can easily reduce to 3/4 cup)
1 egg, beaten
1 teaspoon vanilla
1 teaspoon baking soda
Pinch of salt
1 1/2 cups of all-purpose flour

Method
No need for a mixer for this recipe. Preheat the oven to 350°F (175°C). With a wooden spoon, mix butter into the mashed bananas in a large mixing bowl. Mix in the sugar, egg, and vanilla. Sprinkle the baking soda and salt over the mixture and mix in. Add the flour last, mix. Pour mixture into a buttered 4x8 inch loaf pan. Bake for 1 hour. Cool on a rack. Remove from pan and slice to serve.


***Tip: Don't want to leave them sitting around your kitchen, or just not ready when your bananas are finally stinky, brown? Simply freeze them! I have a whole shelf of frozen bananas in my freezer, just waiting to be turned into banana treats!

3/8/09

Skid-Proof Home Decor

We realized several weeks ago that our shower floor is pretty damn slippery. After nearly everyone in the family had taken a near spill, it became apparent that we needed a solution.

So, we went out and bought some of those non-slip shower stick-on's. We chose the gray butterflies because they were, believe it or not, the least feminine or childish of the choices in shapes. The choices were essentially these:

So, we got home to find that our husband is HORRIFIED by this idea. I guess the image of himself prancing around in the nude atop cute, whimsical butterflies was offensive to his manliness. We quickly got a staunch "no go" on that idea.

Now, however, we were stuck with this whole pack of shower stickers that we secretly thought were kinda cute. And we certainly couldn't return them because they were already opened.

Problem: What to do with those shower stickers we're not allowed to affix to the shower floor?

Solution: Wall art! We discovered that these stickers make really cute, modern wall art that just happened to look really nice on our closet doors.

And the best part is that they're not flimsy so they can be removed multiple times without tearing and they didn't remove any paint or cause any damage to the doors... trust me, I had to move them around for a long time before I got them in a pattern I liked.

Check it:

I can imagine using the more feminine or childish shapes in a child's room, a kid's bathroom or as stencils even.

...Somehow the closet door idea got by Hubby's filter.. maybe it's the lack of walking on them while nude, we're not sure. But, we're so glad we didn't have to throw them away.

PS -- We ended up with what I'll refer to as a "grandma mat" in the bathtub to prevent slipping. Apparently Hubby is comfortable with that idea.

3/3/09

The Curious Case of Bags of Buttons

Speaking of those lil' bitty button bags we talked about yesterday... while we conquered the problem of the little plastic bag itself, we didn't address the buttons inside. But never fear my friends, Everyday Alternative has a solution for that too!

Problem #2 The Buttons

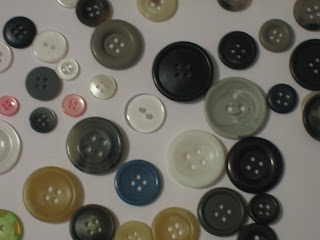
What to do, what to do with all those extra buttons? First, make sure you're not going to need them anymore. We kept 4 or 5 distinguishable buttons ..just in case.

Solution ...All-in-One Jewelry Storage System

We are total jewelry hags. We love the stuff. We're lucky that our husband is not only great at picking out jewelry on special occasions, but also very supportive of our habit. (phew!)

At the current time, however, we live in a very small space and so all our necklaces are crammed into this foot-tall, box shape, clear necklace storage thing. While it serves the purpose of storing the jewelry, it makes finding anything a nightmare of tangled necklaces. Plus, we often find ourselves just grabbing the easiest thing to grab and not really wearing what we want... or being able to see it for that matter.

So, we took all those extra buttons and super-glued them to an extra hanger we already had lying around. We made sure to glue the biggest buttons so that they left a "ledge" for hanging, along the long, straight (bottom) part of the hanger. Smaller buttons turned out to be perfect for hanging bracelets and poking earrings through. And it sure makes picking out jewelry in the mornings a whole lot easier...plus we can really see what we have.

Here's what it looked like while we were working on it:


And voila! Here's the end result:


Total time: Maybe 30 minutes, but let the glue dry over night before placing jewelry on it.

Alternative Options: More buttons, possibly using a hot glue gun, different sized buttons, more hangers

Let us know what you think if you try this out.

3/2/09

Lil' Bitty Button Bags


Don't know about you, but we always feel inclined to keep the buttons that come with clothes we buy. And, quite honestly, after taking inventory this evening, we have a plethora of buttons that we're pretty sure have no clothes to go with them anymore... seriously, we've been saving these things for years.

Problem #1: Button Bags

What are we supposed to do with all those lil' bitty button bags? They're plastic which we know is bad for the environment, but we clearly can't take our lunch to work in something this size.

Solution: Individual Pill Bags

We thought of this when our husband called and asked us to run some Advil out to him this evening. It didn't seem right to carry a handful of Advil out to the car and expect him to swallow them after ruminating in our sweaty palms. DING, the light went off! The button bags! This little guy made the perfect individual carrying case.

AND, we think it would be the perfect way to pack pills for a trip... at least so you didn't have to get one of those grandma pill-carrying cases that you buy at the drug store. You could simply put all your daily meds/vitamins/pills in a marked bag and have a quick grab at it, on the go!

And the best part is that they'll hold up time and again, we bet!

iPod Bit the Big One? No Tears, Just Lung Cancer!

Broken iPod? No need to get angry and throw it out the car window. Strip it of all its dignity and then make it into a cigarette case!

Welcome to Everyday Alternative!

While this blog is currently still under construction, you can look forward a world of information about taking your stuff and reusing it in new and useful ways. It's amazing how much stuff you can recycle into useable objects, tools, art, etc.

I can't wait to share with you all the ideas I find.

Please e-mail me at rockchalk1979@yahoo.com if you have an idea you'd like me to share. I'd love to hear from you!

Jennie Day-Burget